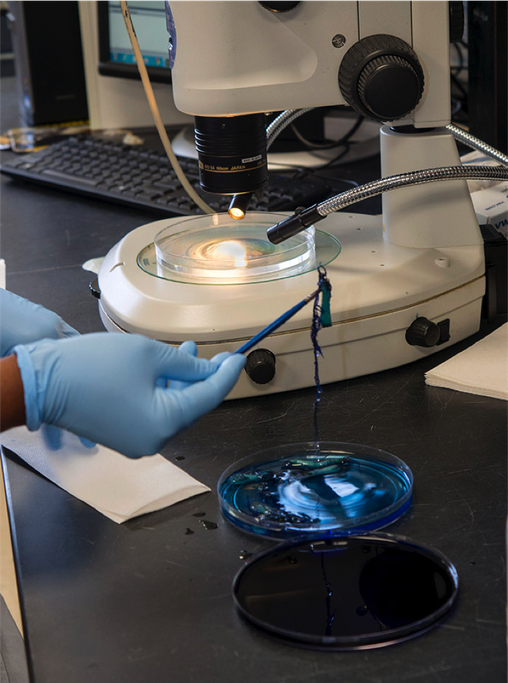
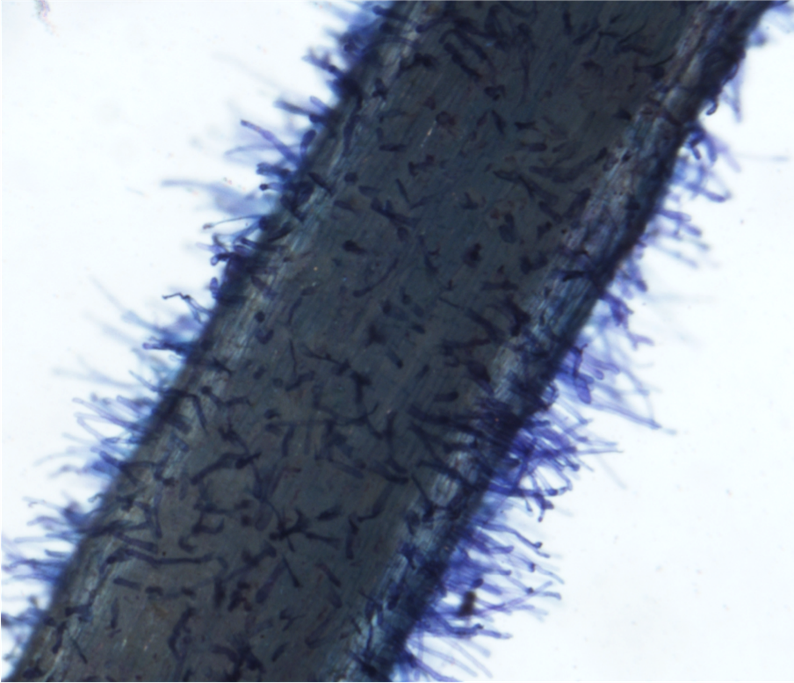
- Fill one Petri dish with DI water, and a second dish with 0.05% Toluidine blue dye. Using forceps, immerse the root in the blue dye for approximately 5 seconds. Rinse the root in the DI water. Place the root on a 3"x 5" glass plate. Pipette DI water over the root until it is covered, to suspend the root hairs. Place the plate on the dissecting microscope stage.
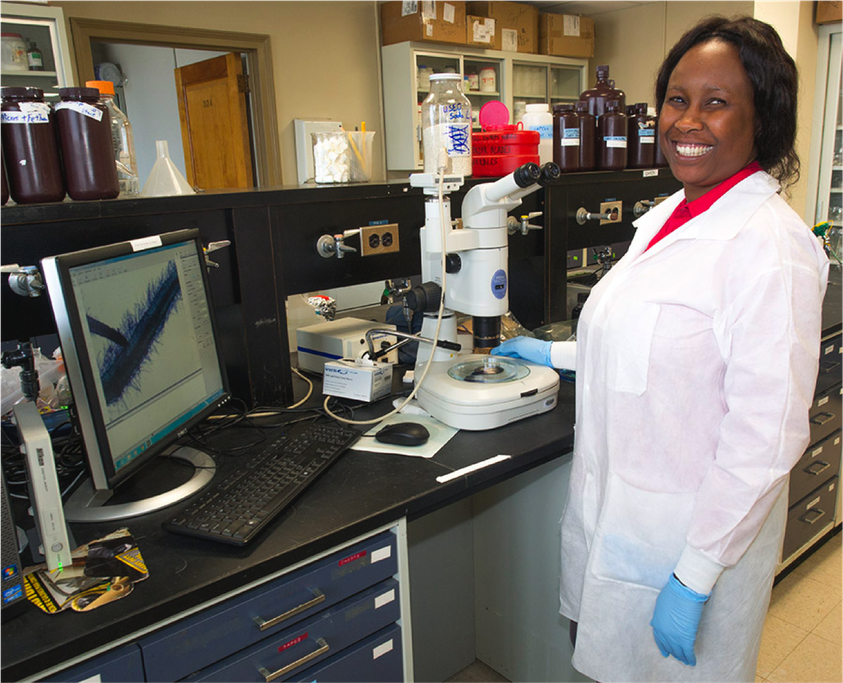
- Use a camera-mounted microscope (Nikon Digital Sight) connected to a computer with NIS Elements. Under "camera settings" set "Fast Focus" to 640x480 to increase camera speed when focusing, and set "Quality (capture)" to 2560x1920 to maximize the quality of the captured image. Select the "scale" tab, which will be needed for scaling the image for analysis in ImageJ. Adjust magnification to 2x. Turn on the flexible lights and microscope base lights to illuminate the stage as needed.
- To capture an image, click the "Auto" button in NIS Elements. Your image will appear at the bottom of the window, and can be renamed. Images should save automatically to the same folder. (Include a photo with a hemacytometer or ruler for image scaling.)
Image analysis
- Download the free image analysis program "ImageJ" from the NIH website (http://rsbweb.nih.gov/ij/).
- Open the calibration image. Select the line tool, zoom in (press '+' and hold the space bar down to move the image with your cursor) and carefully trace a known distance in the image, e.g. 1 mm on a ruler. Use "Analyze" and "Set Scale" , set the Known Distance and Unit (in this case it's 1.00 and mm), select "Global". This will set the image scale for all of your images, so the results/output is in your unit of choice.
- Import your folder of images using "File", "Import", "Image sequence". If you have many images, select the "virtual stack" option to speed up import. If the images can't load, go to "Edit", "Options", "Memory & Threads" and increase the memory allocated to ImageJ based on your computer's RAM. Alternatively, open one image at a time using "File" , "Open" or "Open Next".
- Under "Analyze", "Set Measurements...", select "Display label" to include a file name in your results output.
- Root hair length. Open your root hair image. Select the line tool (right click for "straight line", "segmented line" or "freehand" depending on your preference). Trace and measure the length of root hairs of interest. Hit 'M' to record the measurement in the Results window. When you are finished measuring all images, don't close the images - save or copy the Results window output and open it as a tab-delimited file in Excel or another spreadsheet format. Create a new column for root hair count in your spreadsheet.
- Root hair density.
In ImageJ, start from the first root image. Use the rectangle tool to select a representative area of the root. Hit 'M' to record the area. Then, visually count the number of root hairs in the selected area. Record this count in your spreadsheet. When you are done with all of the images, copy the Results window area values column into your spreadsheet. Divide the root hair count by area e.g. to calculate the number of root hairs per mm^2.
Dye roots
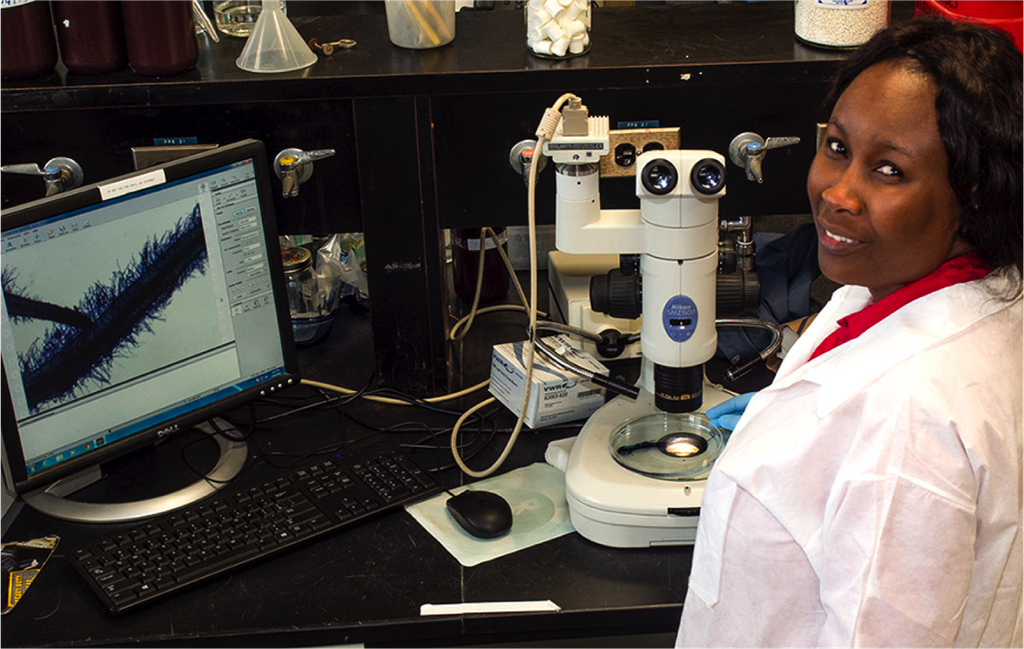
Prepare microscope for analysis
Place dyed roots on microscope stage

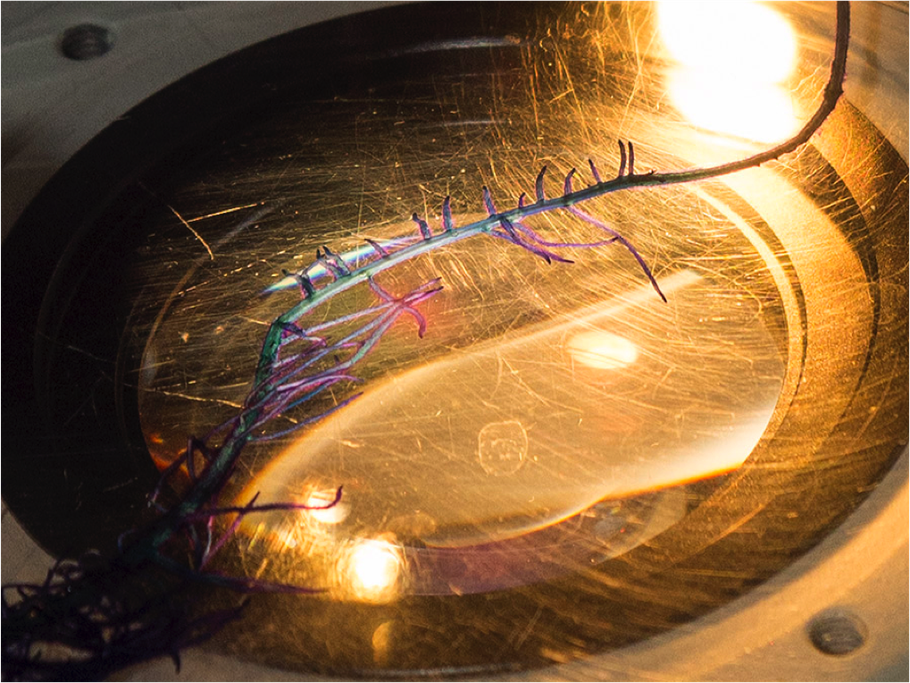
Focus microscope on root edge for measuring root hair length
Focus microscope on top surface of root for measuring root hair density
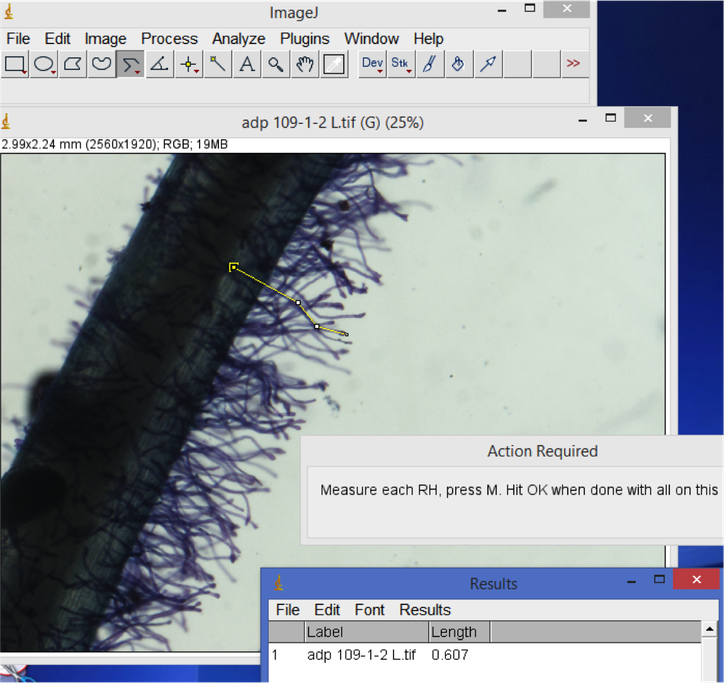
Measure length of root hairs in ImageJ
Click for enlarged image
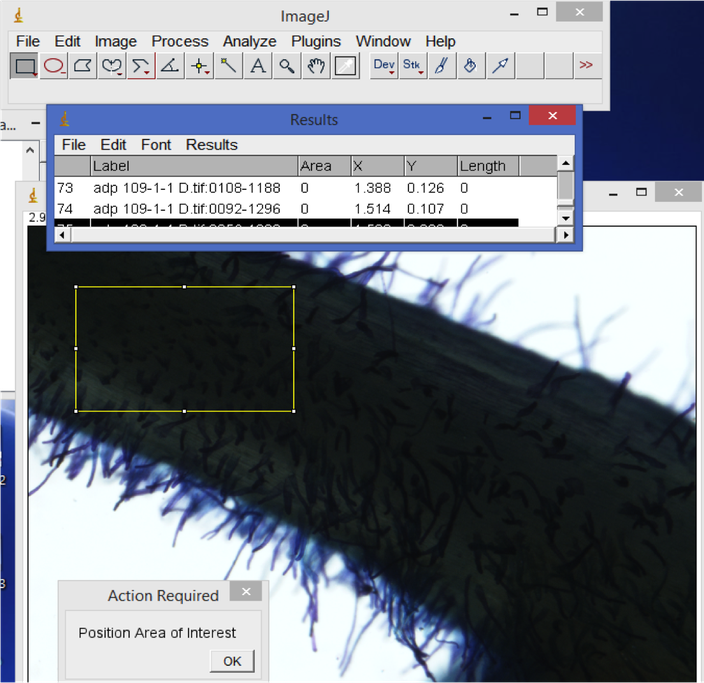
Measure root hair density in ImageJ
Click for enlarged image
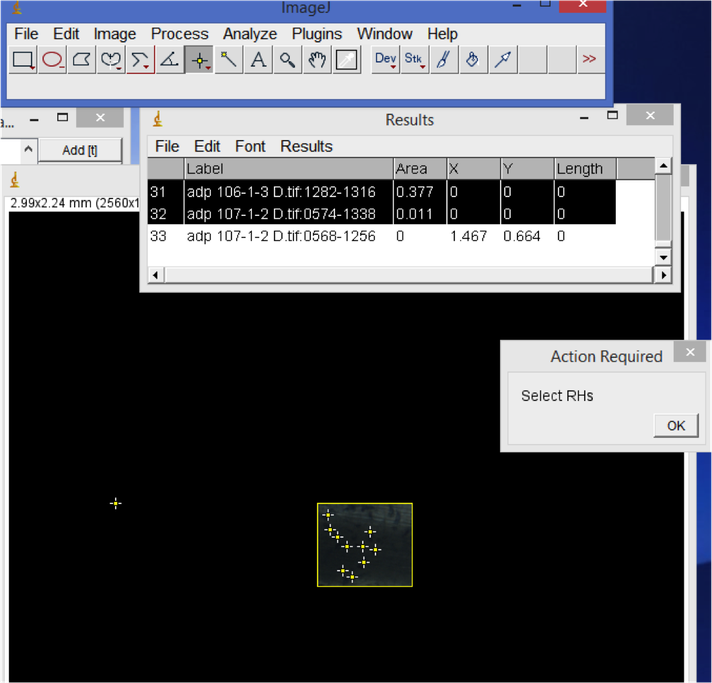
Count root hairs per mm2 in ImageJ
Click for enlarged image