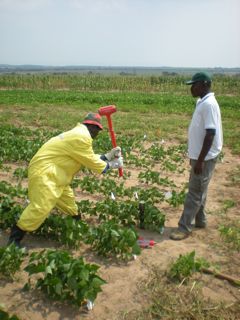
Step 1: Select location
Distance between stems should be consistent. We usually take soil cores between 2 representative plants in a row.

Step 2: Pound soil core in
Make sure the tip is screwed all the way in so the threads are not ruined and hit the pounding head of the cylinder using medium strength swings. Hitting too hard can result in ruining the tip because you won't notice when you hit a rock or can lead to ruining the pounding head. When striking the pounding head with the sledge- hammer (we use an 8lb hammer), strike it in such a way so that the flat surface of the hammer matches squarely with the flat surface of the pounding head. This will reduce denting and deformation of the pounding head. It is preferable to either use a hammer coated with polyethylene or have a second person hold a block of wood on top of the pounding head so that the top of the cylinder does not deform. Striking the sledge hammer directly on the pounding head will eventually cause the top of the cylinder to deform and make getting the pulling head in and out very difficult and necessitate grinding either the pulling head insert or grinding the inside of the top of the cylinder.
Step 3: Pull soil core out
Remove the pounding head and insert the pulling head with its pin. If you're lucky and the soil is sandy or loose you or perhaps you and a partner can pull it out by hand. The core will come out easiest if it is pulled out at the same angle that it was pounded in. More than likely, you won't be lucky and you have to use a car jack to lift the core out. Put the jack underneath the handle of the pulling head and jack it up. Once the jack is completely extended try to pull it out by hand. It should come much more easily but sometimes it doesn't so have somebody help you or put a thick block of wood on top of the jack and jack the core out a few more inches before you try pulling by hand again.

Step 4: Take soil core out of metal cylinder
Removing the actual soil core from the metal cylinder is usually accomplished by simply dumping it into another capped core. Cap both ends of the core, label it clearly and put it in the shade until you can store it properly. Tricks for getting stuck samples out included lightly tapping the metal part of the soil core tube, tapping one end of the tube on the ground, pushing it through with a blunt stick or metal rod, or pulling the liner our with pliers.
Step 5: Store or wash the core
Soil cores should be stored at 4C or cooler. If all you want to analyze is length and diameter than they can be stored for long periods at this temperature. If you want to do other analysis such as nitrate or DNA then you need to follow protocols for those methods.
Note:
Be wary when your boss or advisor tries to convince you that taking another 50 cores wouldn't really be that much work. Soil coring can be exhausting work, especially when the soil is dry, hard and/or clayey. Its important to plan ahead and figure out exactly how many cores you need to take and create a schedule so you don't end up trying to do too many a day. As with many jobs, many hands make light work so bring help and take breaks. If you don't you may end up like this poor, underfed graduate student who expired in the arid wastes of Pennsylvania trying to get that last set of soil cores by himself.


